Choosing the parts!
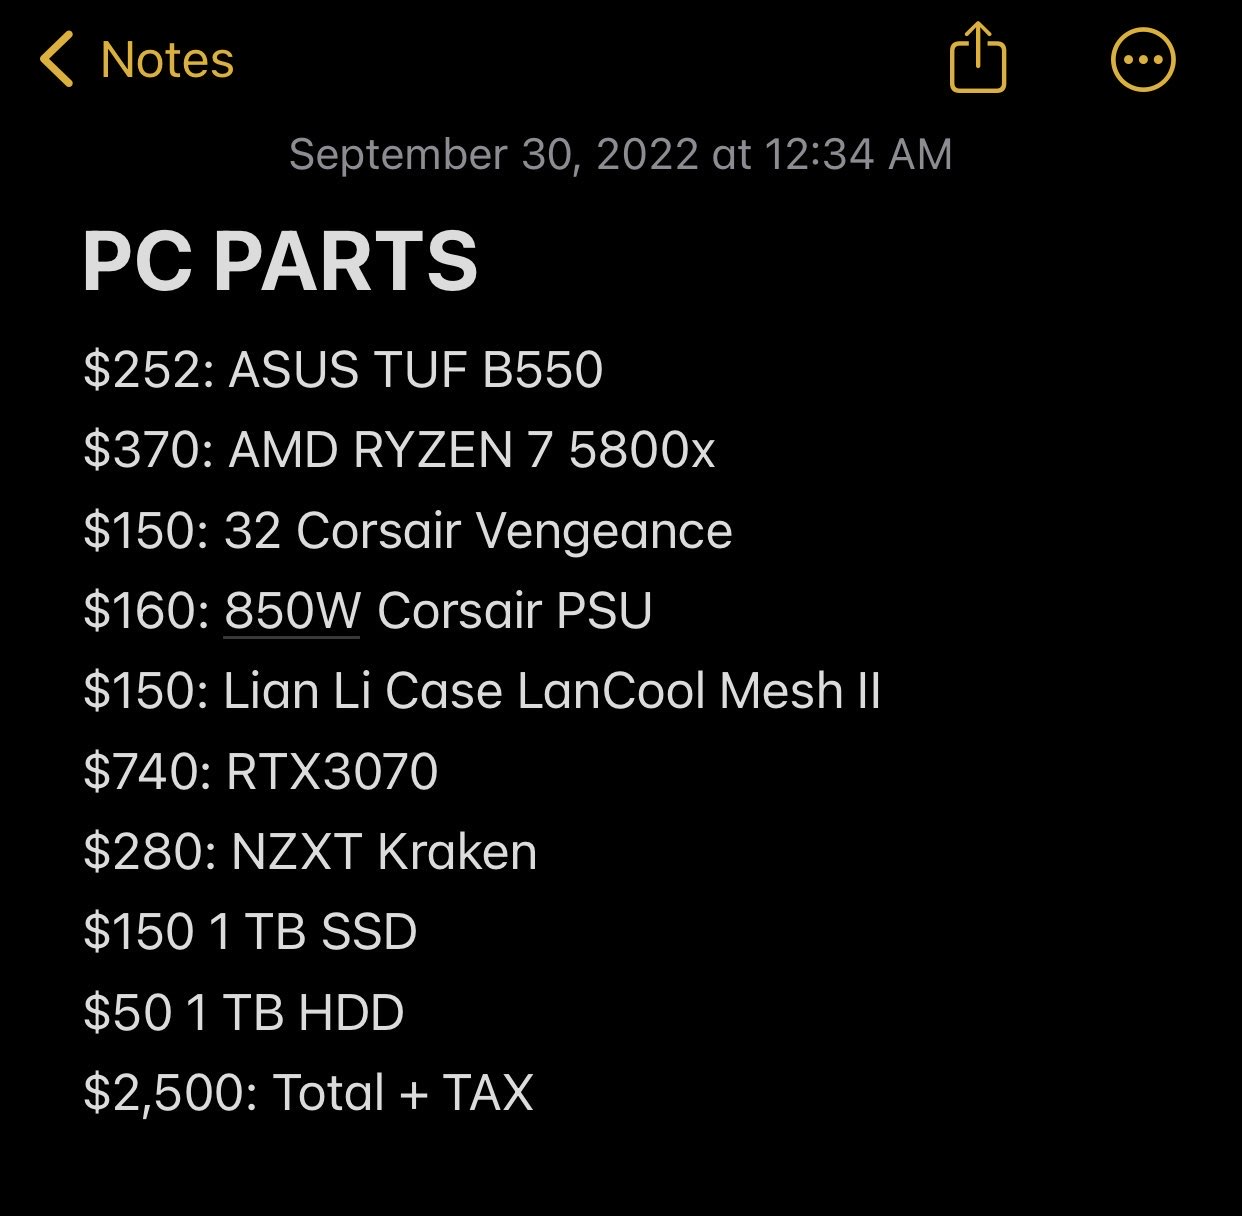

Choosing what to buy: On the left is the first list of parts that I planned to buy.
Changes: The AIO cooler was out of my budget 'NZXT Kraken'. Moreover, Lian Li cases were hard to find in Vancouver. So, I made some changes in my list and chose to get the Lian Li 360 AIO and the cabinet ICUE 4000X RGB.
Compatibility: I had to check the compatibility for the parts so that they can be assembled together and since I was making a high end PC, I had to make sure everything was compatible with each other.
Since this was my second built I knew mostly what was compatible with what component, Though, when checked, the only warning I had was the power use which meant I was good to go with these parts!
I bought the parts from different stores like:
Canada Computers: AIO, PSU.
BestBuy: SSD, Case, CPU, RAM.
Amazon: Graphic Card.
Yes! I did not forget the anti static wrist band and my screw-driver :)
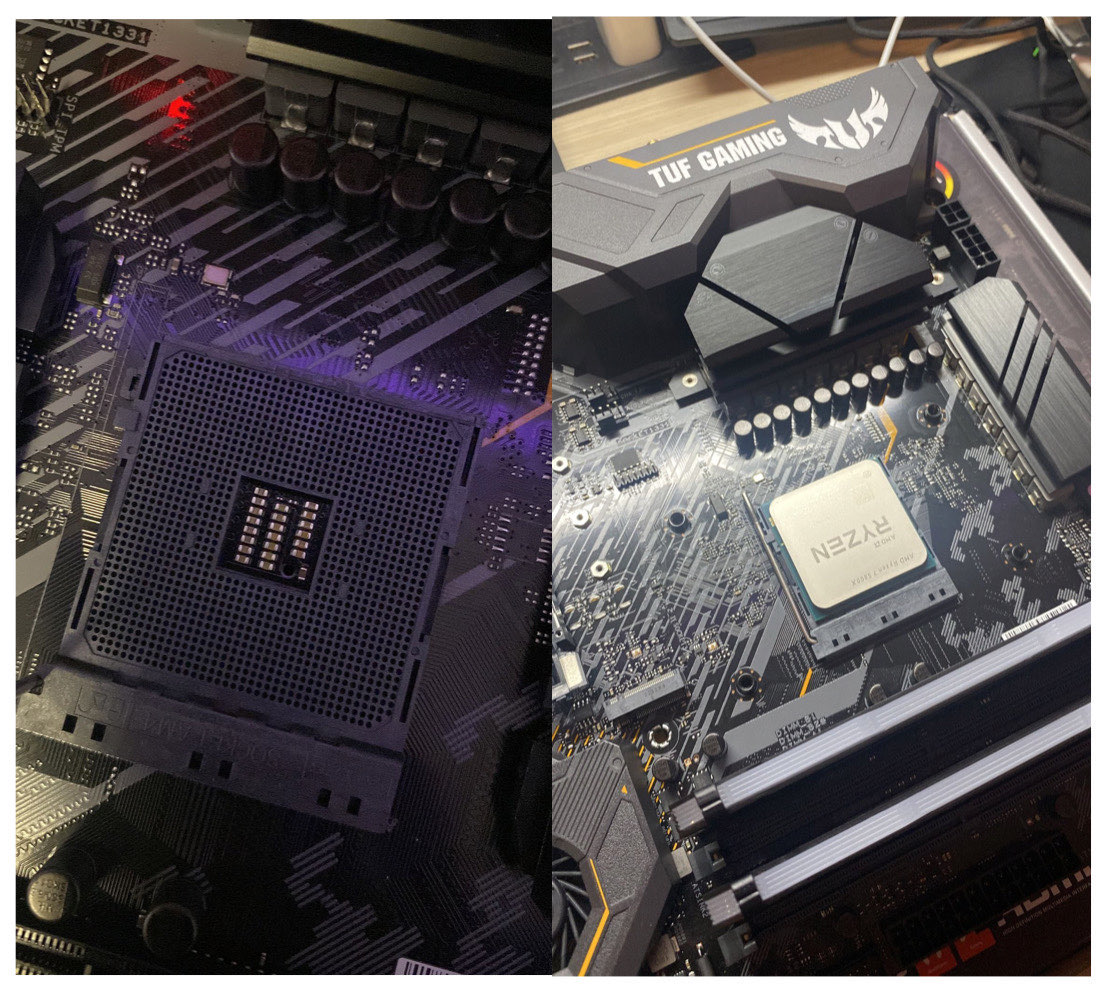
Assembly: After getting the parts, I started to assemble the componenets. First I took the motherboard and I placed the CPU AMD RYZEN 7 5800X, SSD and RAM. After placing them onto the motherboard. The motherboard was ready to be installed onto the case.
Challenges: The biggest challenege was to put the motherboard into the cabinet, As I had worked on big case previously it wasn't a problem, although, this case was relatively very small and placing the motherboard was a a big challenge. To make my job easeier:
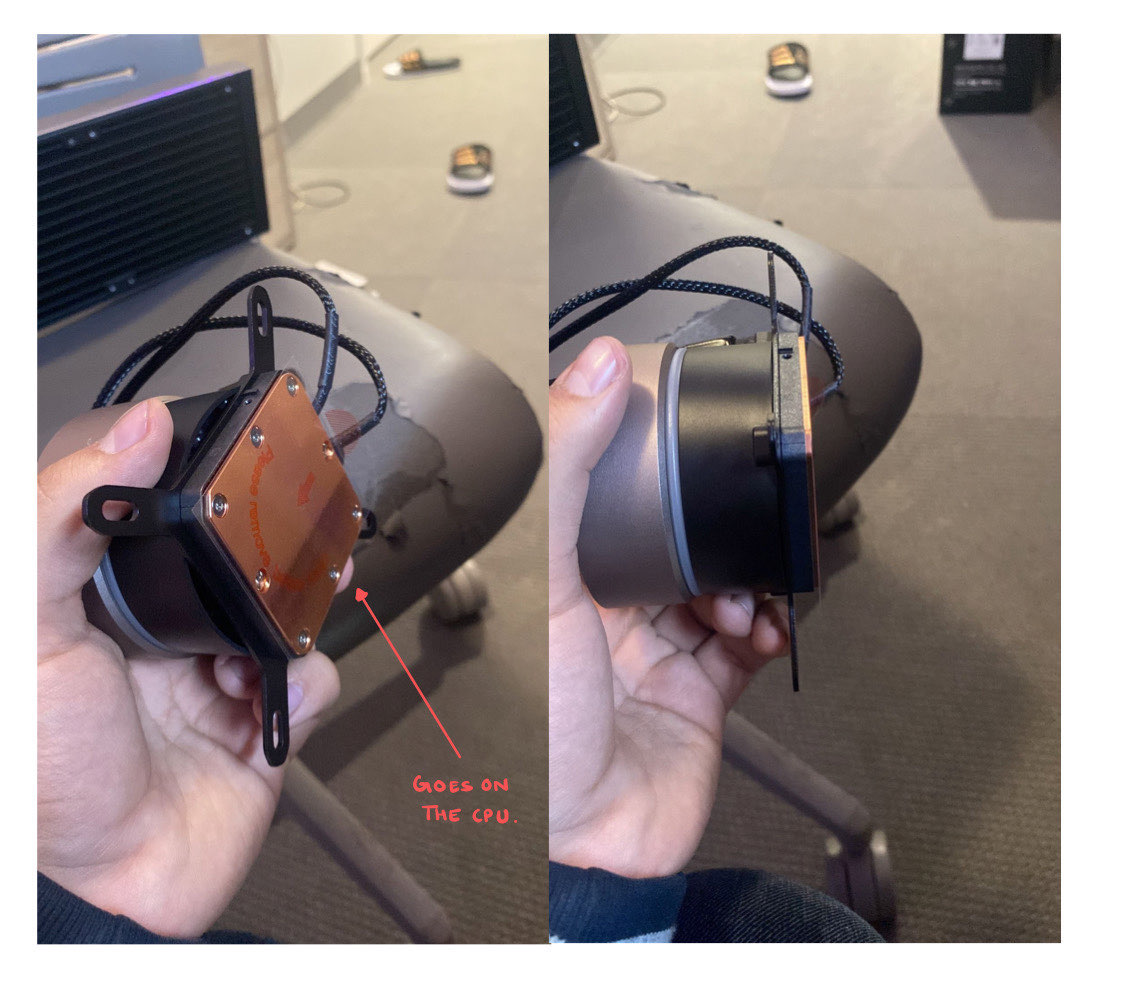
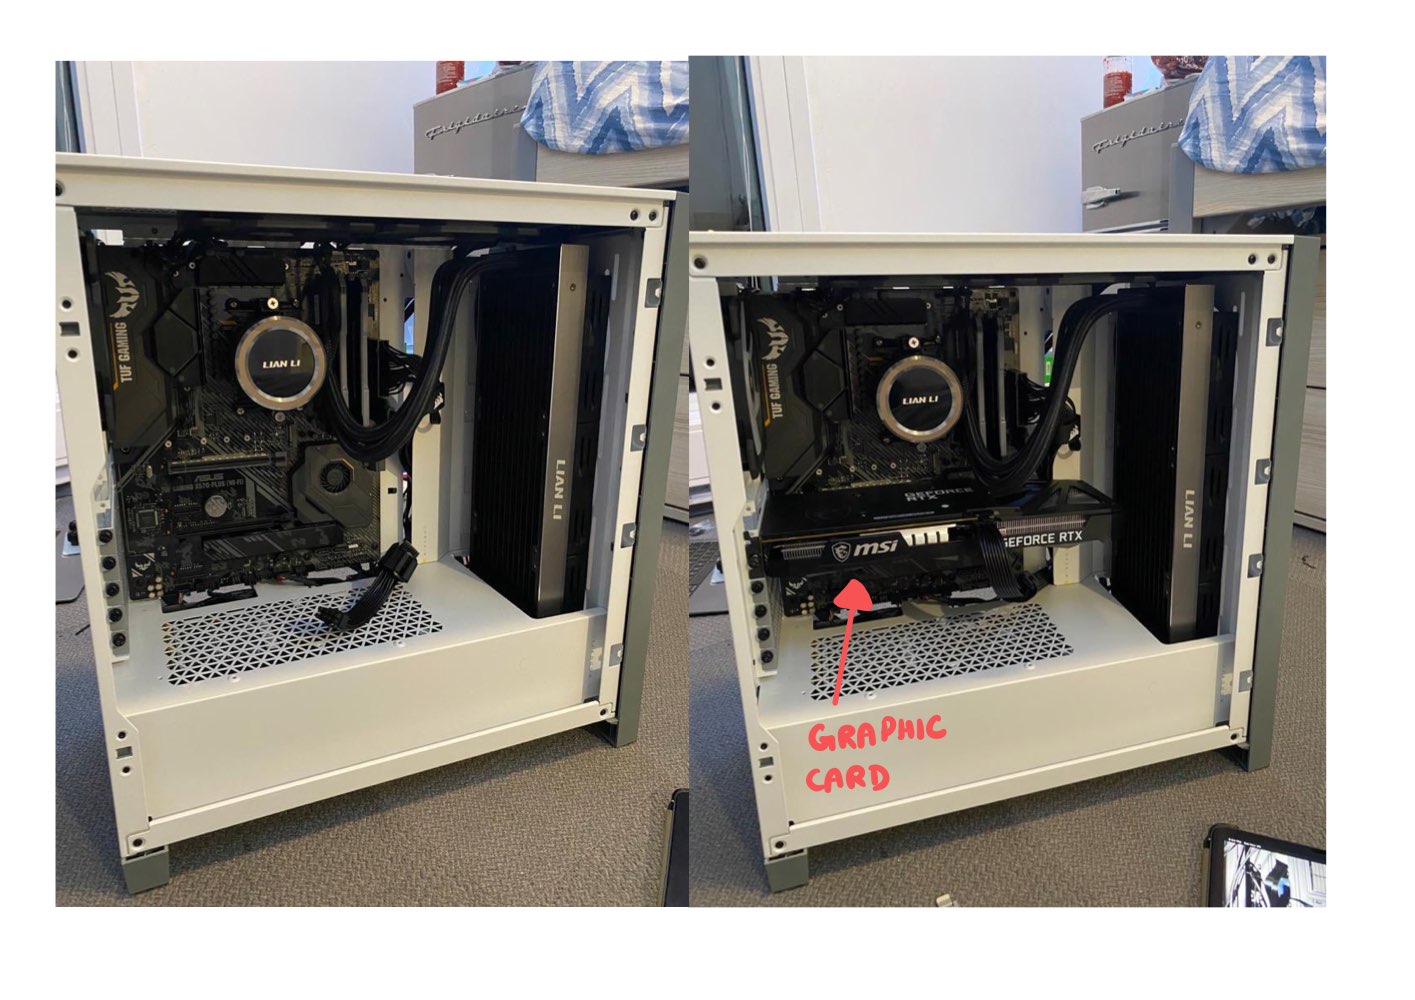
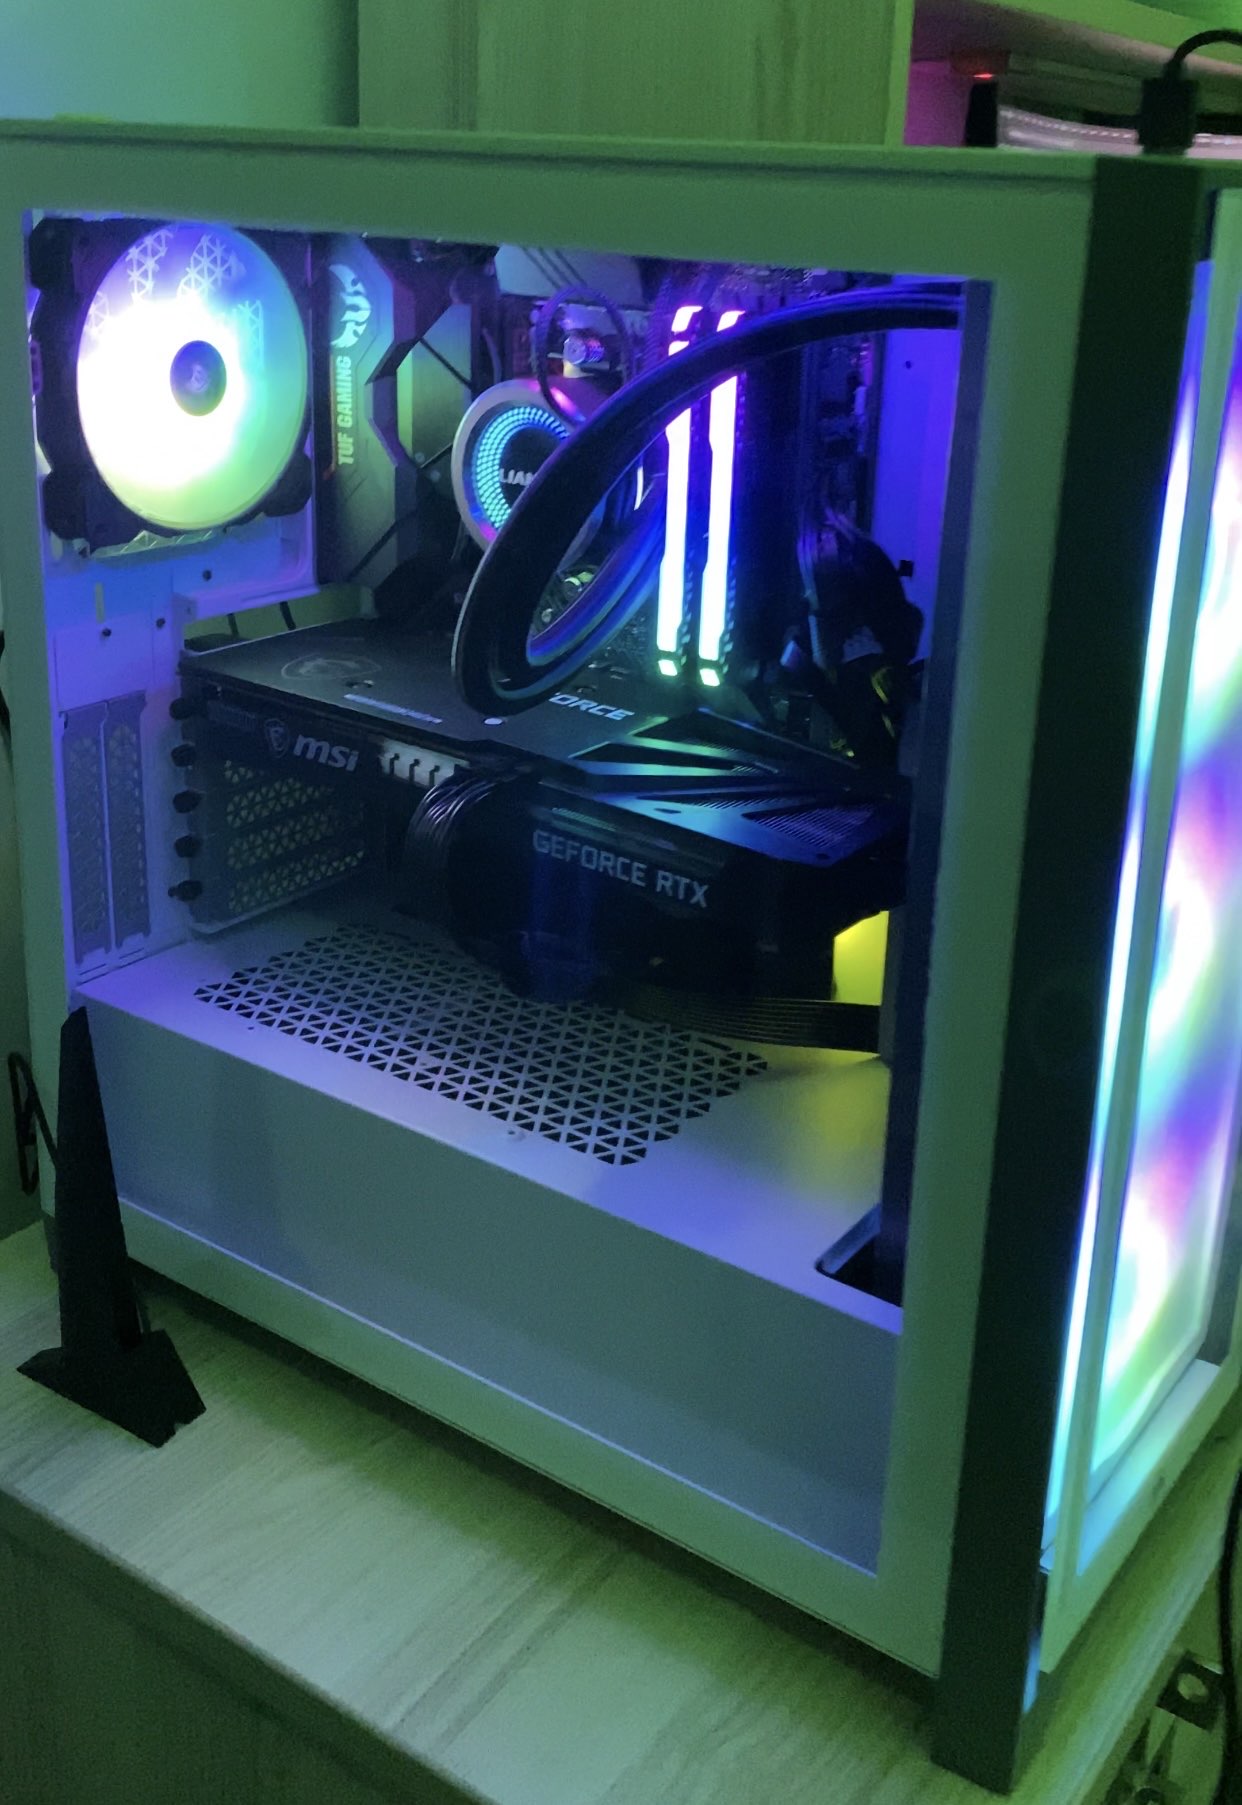
Almost done! After placing the PSU and the cooler, I was left with the most tedious step that's the wiring of the PC. After placing the graphic card, this is how the PC looked.
Wiring: This was the most important part, since I was not that experienced with different types of motherboards since I had built just 1 PC before and that was with the ASUS TUF GAMING B550, I had to make sure I don't make any mistakes in this part as I was working with very expernsive componenets.
Process:
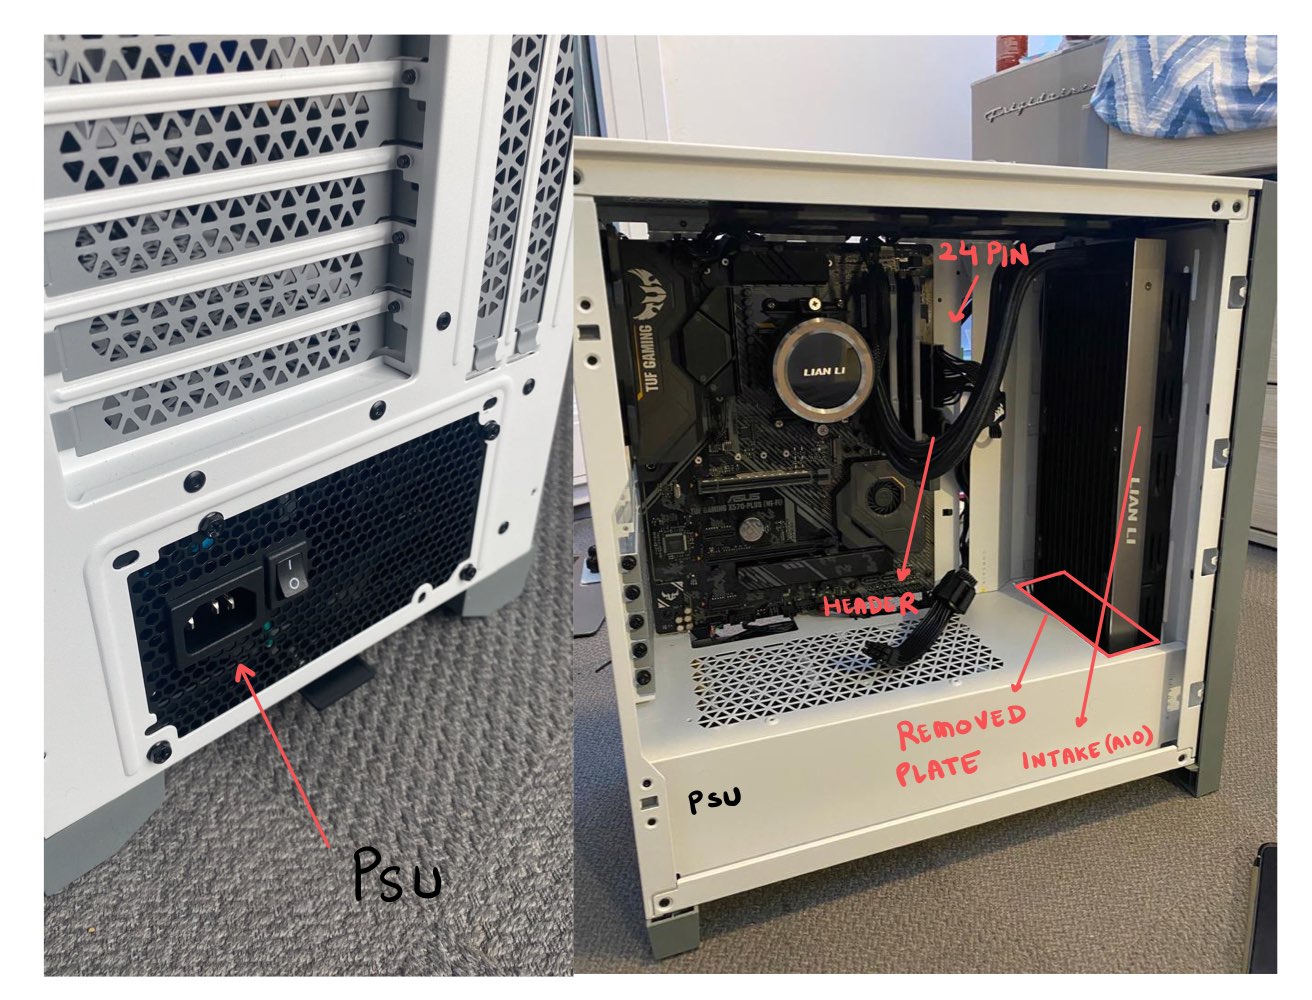
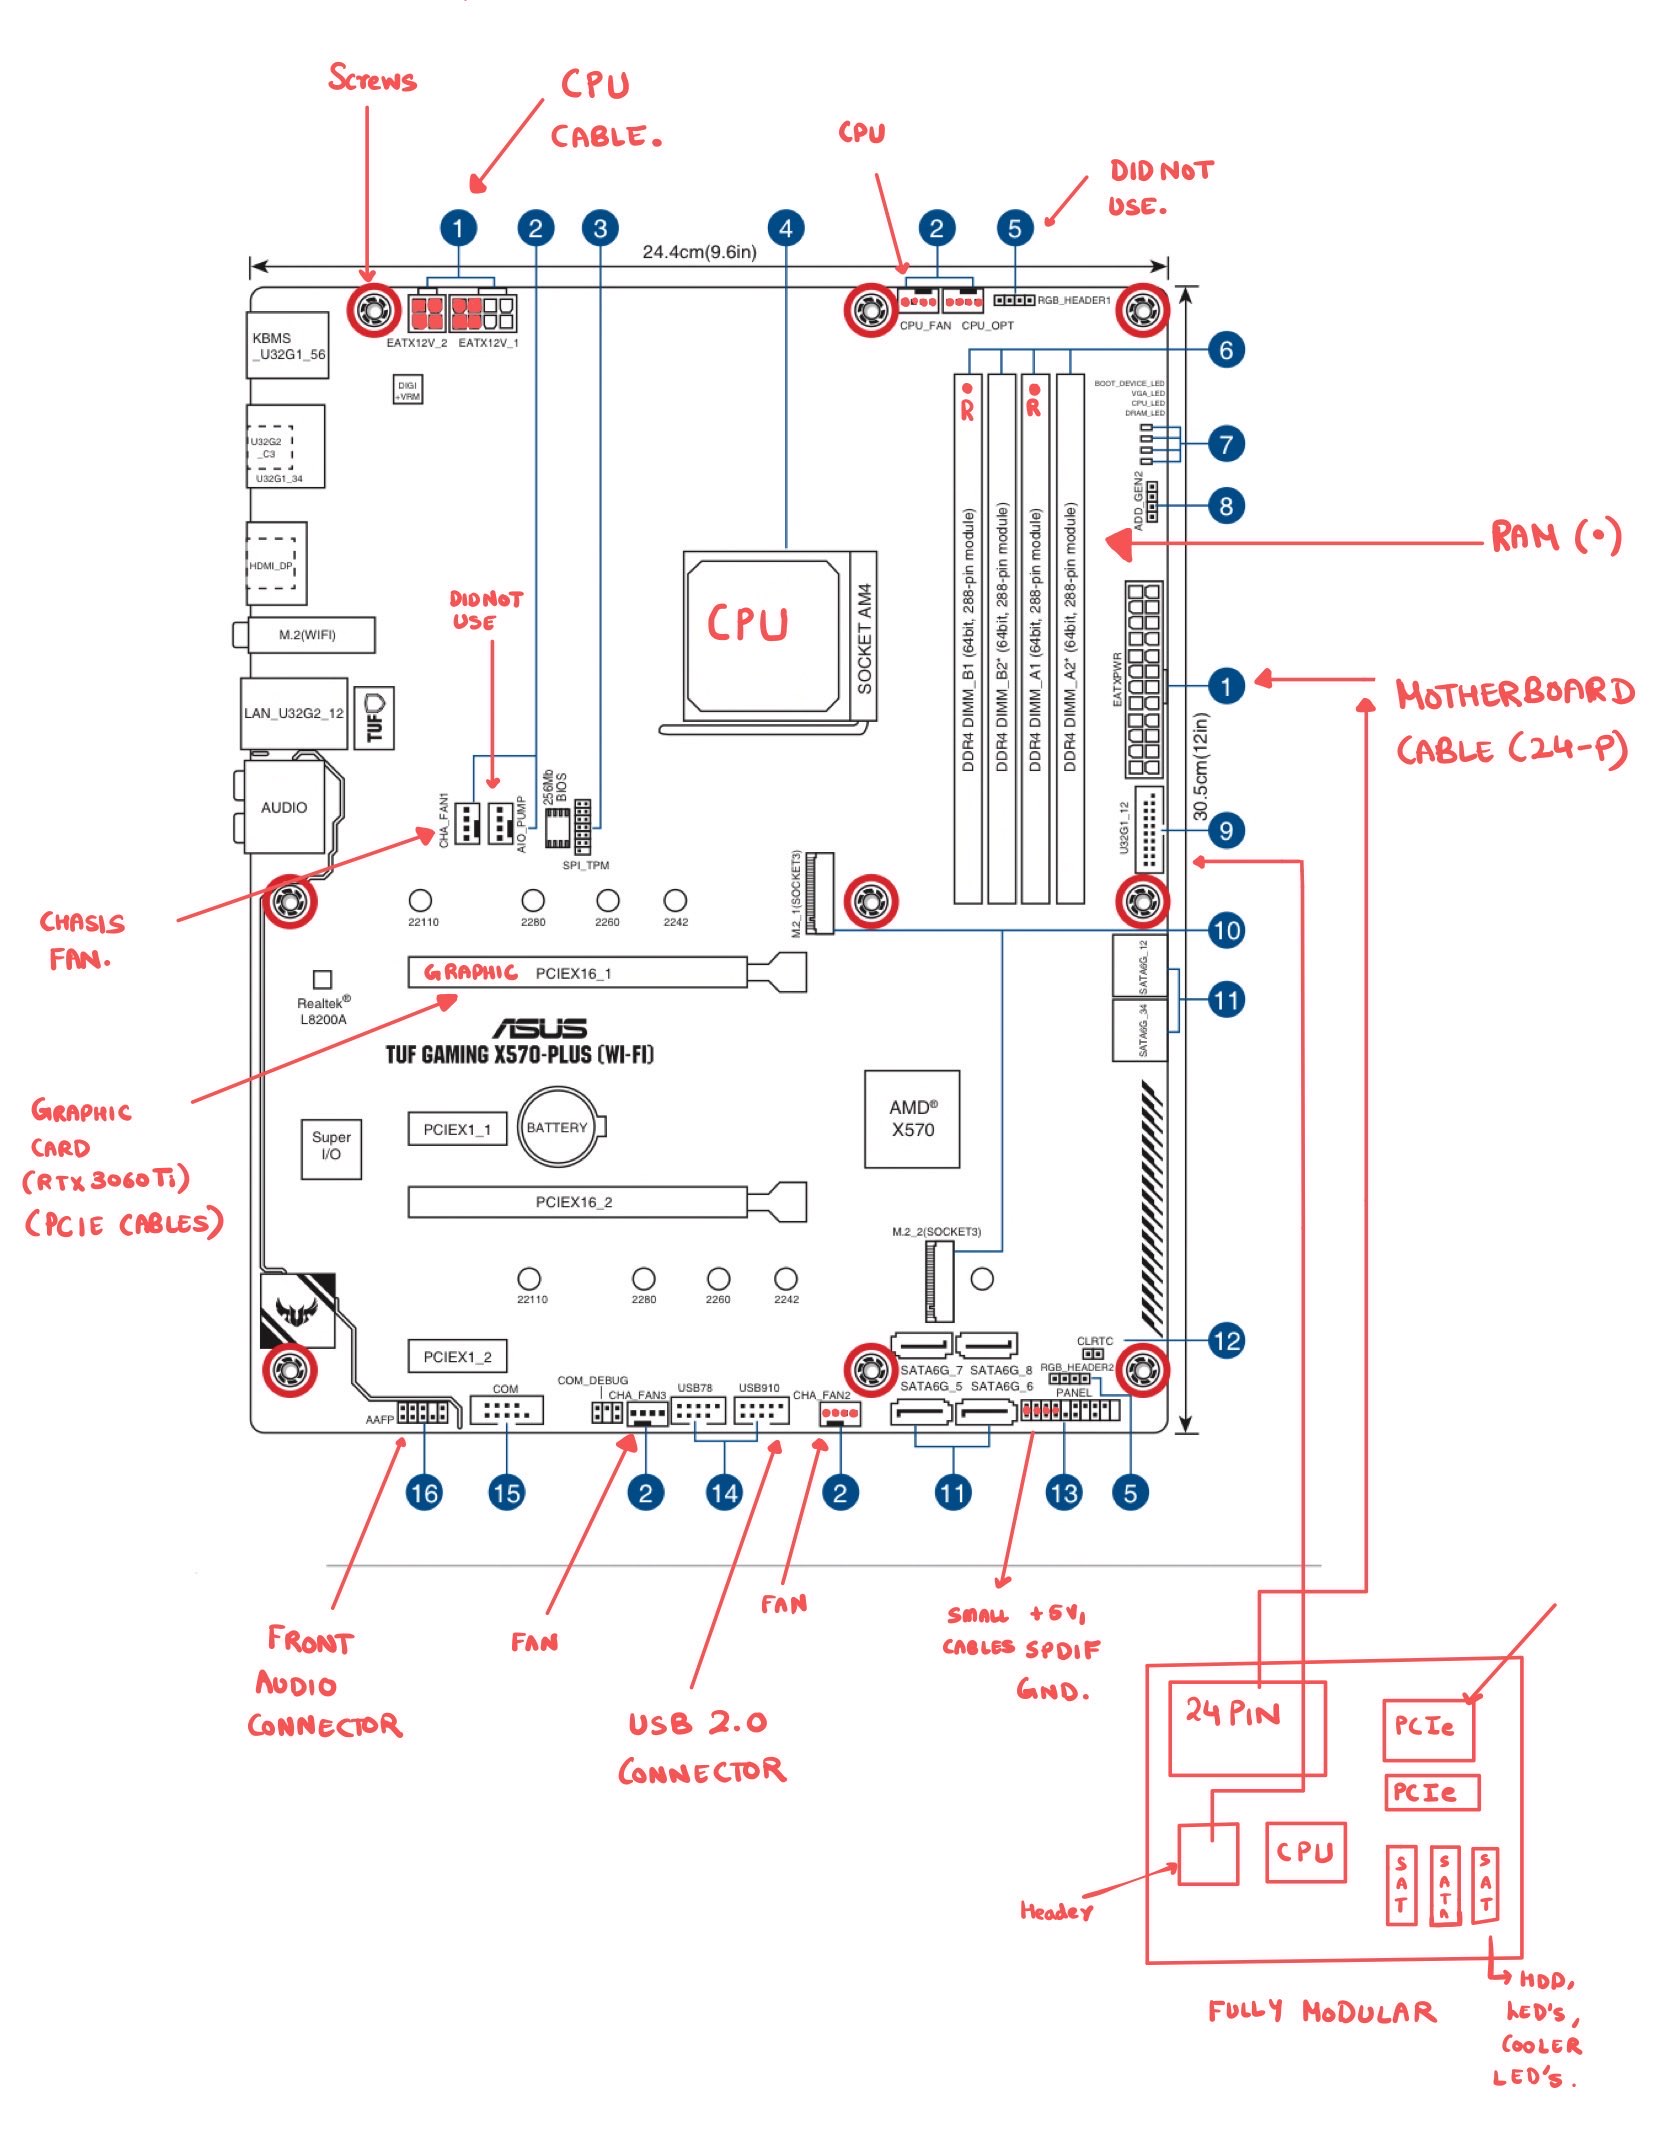
Schematic: Here's a schematic which gives a rough idea of how the wiring was done with rough sketch of PSU.
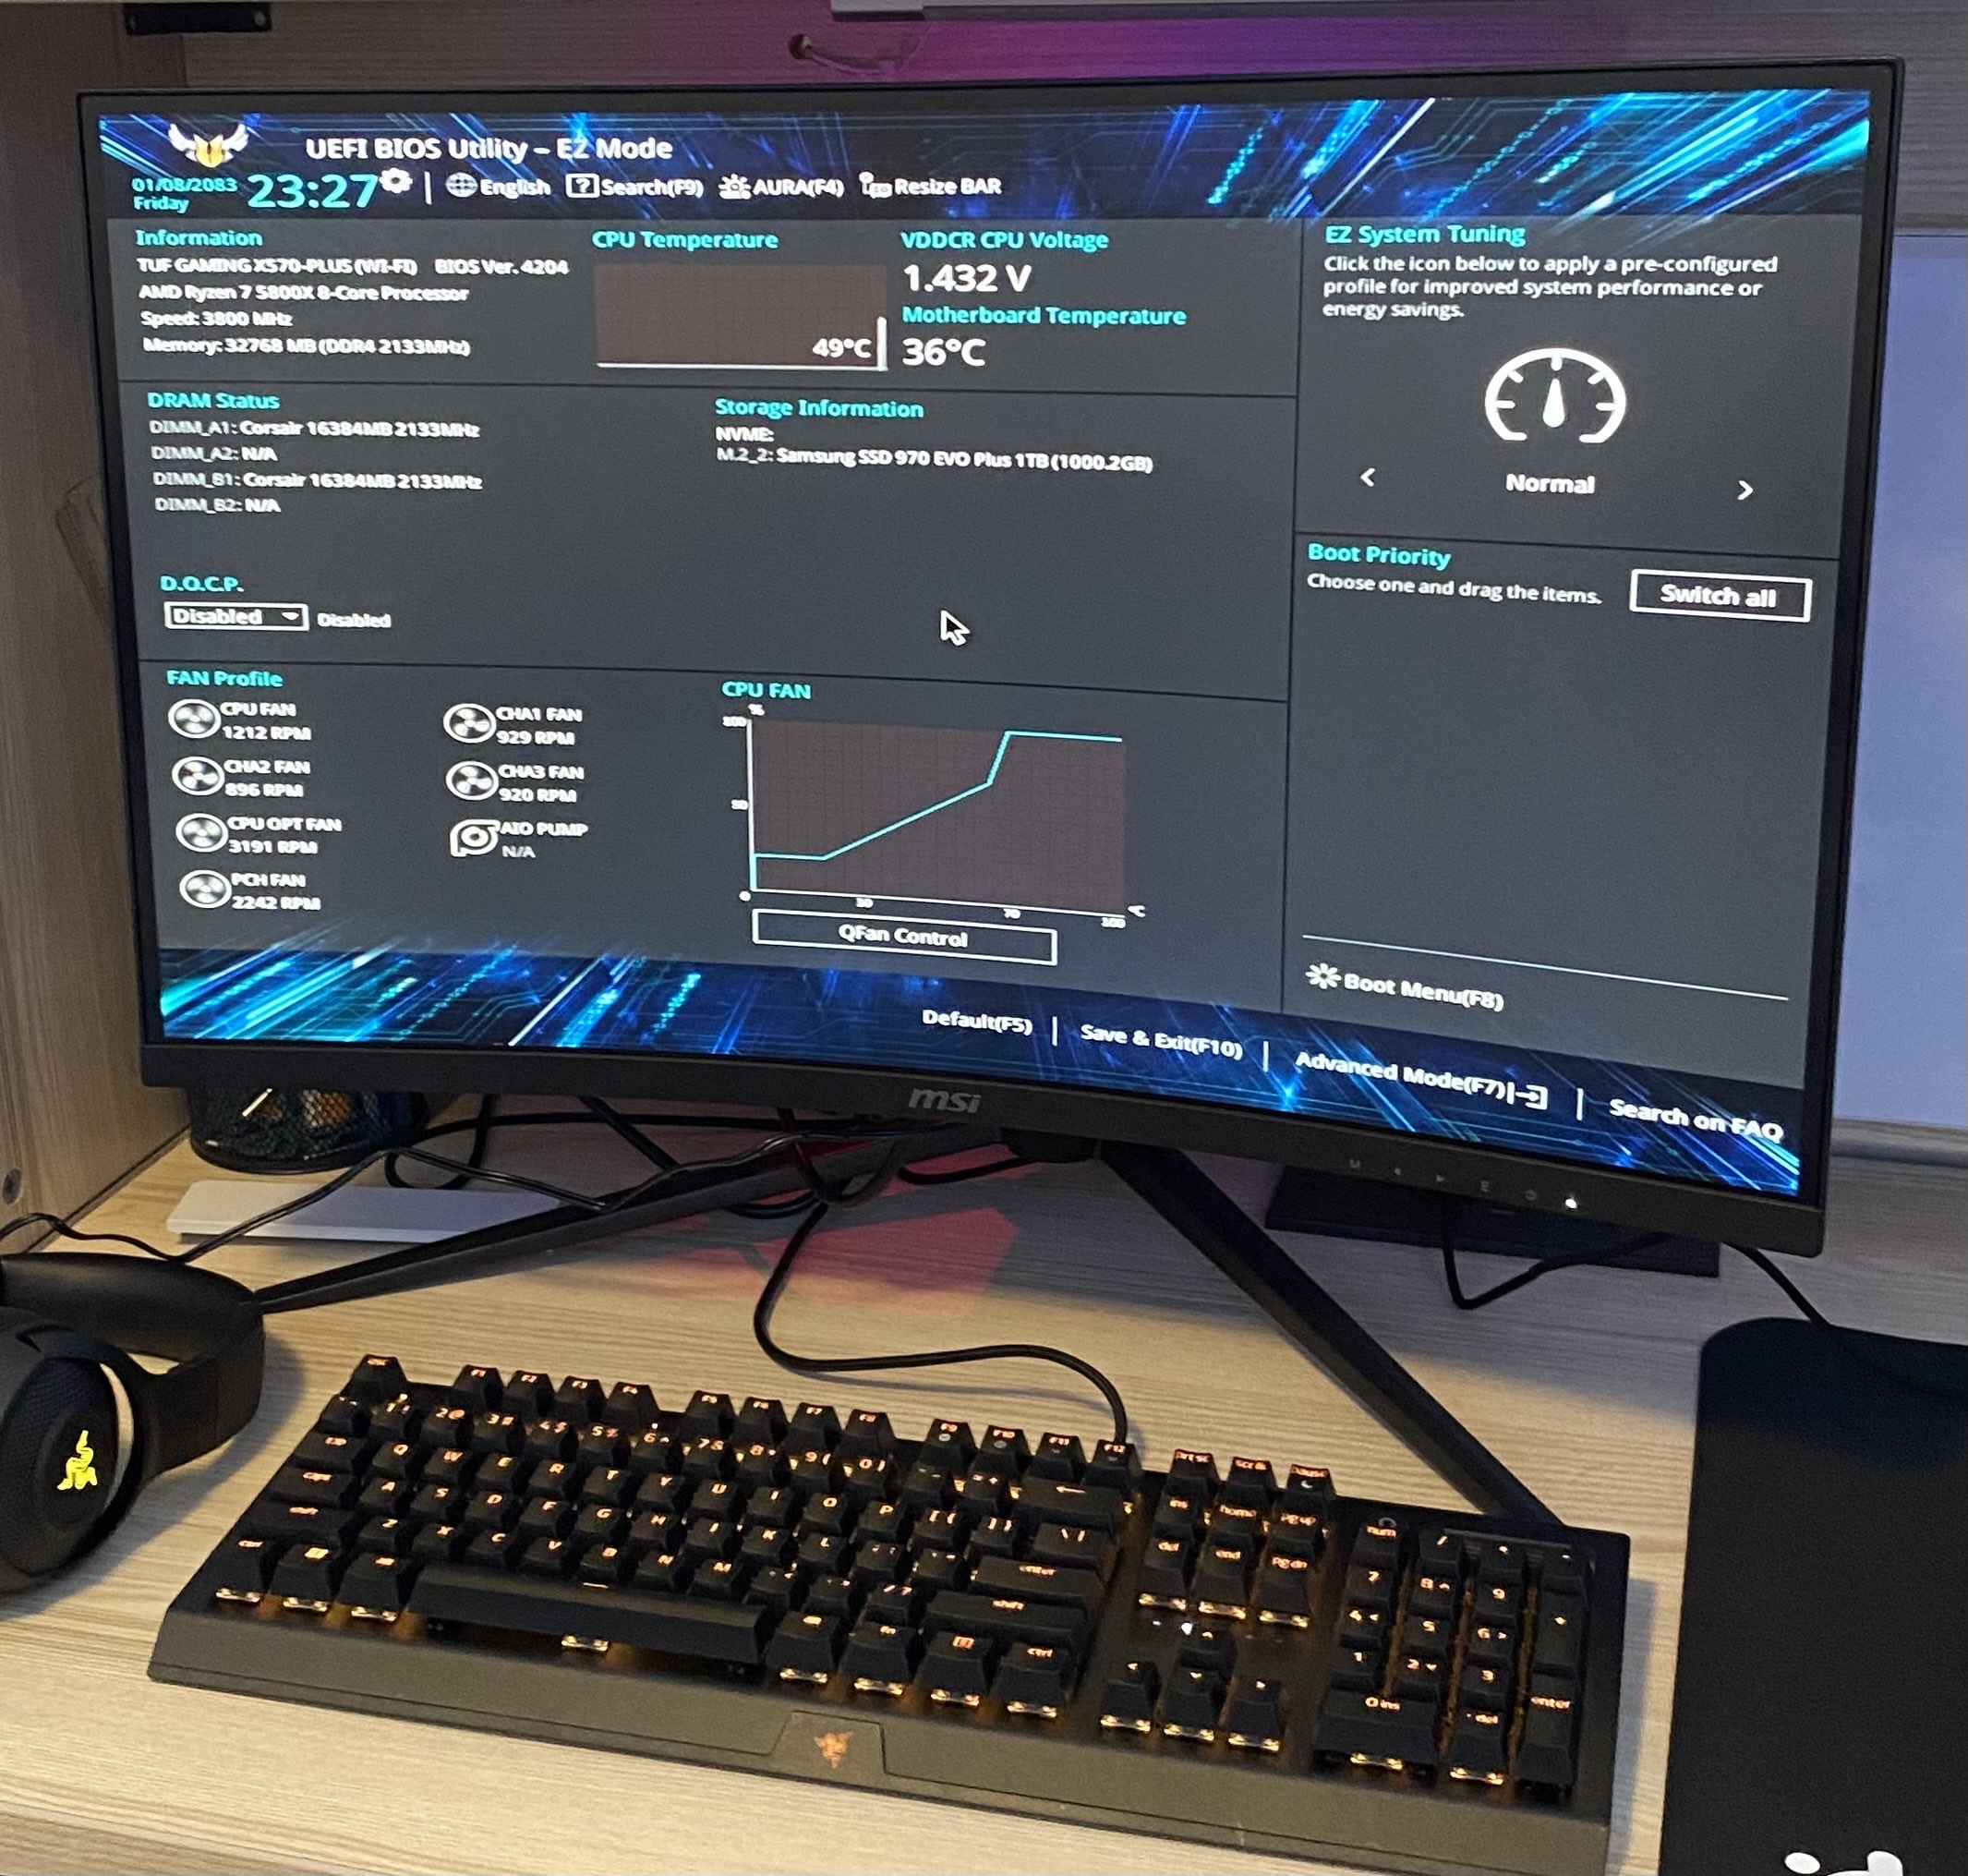
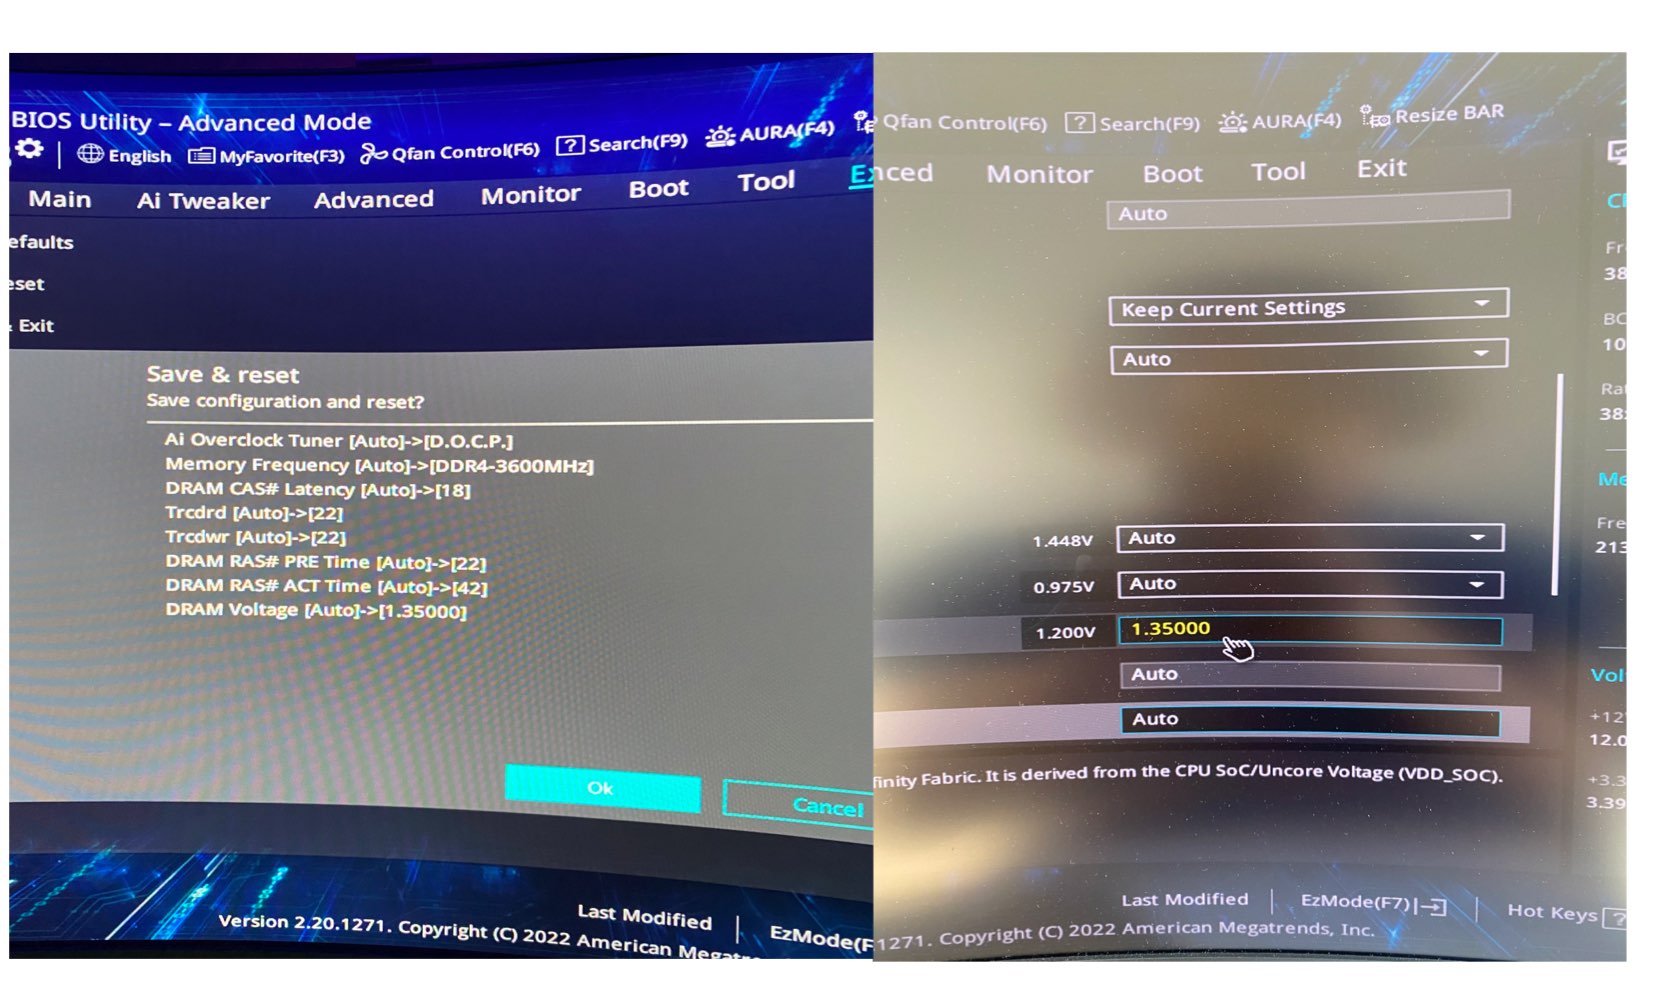
Setting up BIOS+Windows: After plugging in all the wires with the monitor, connecting the DP from the graphic card to the monitor and PSU to the power. We were good to go. Well, after switching on the PC, everything was working perfectly fine. I checked up on the BIOS to see if everything was running fine. This is the easy part, we just need one more computer/laptop that I already had to download the windows runner (a setup) on the laptop and export it on a pendrive. Then use the pendrive to install the windows to the PC.
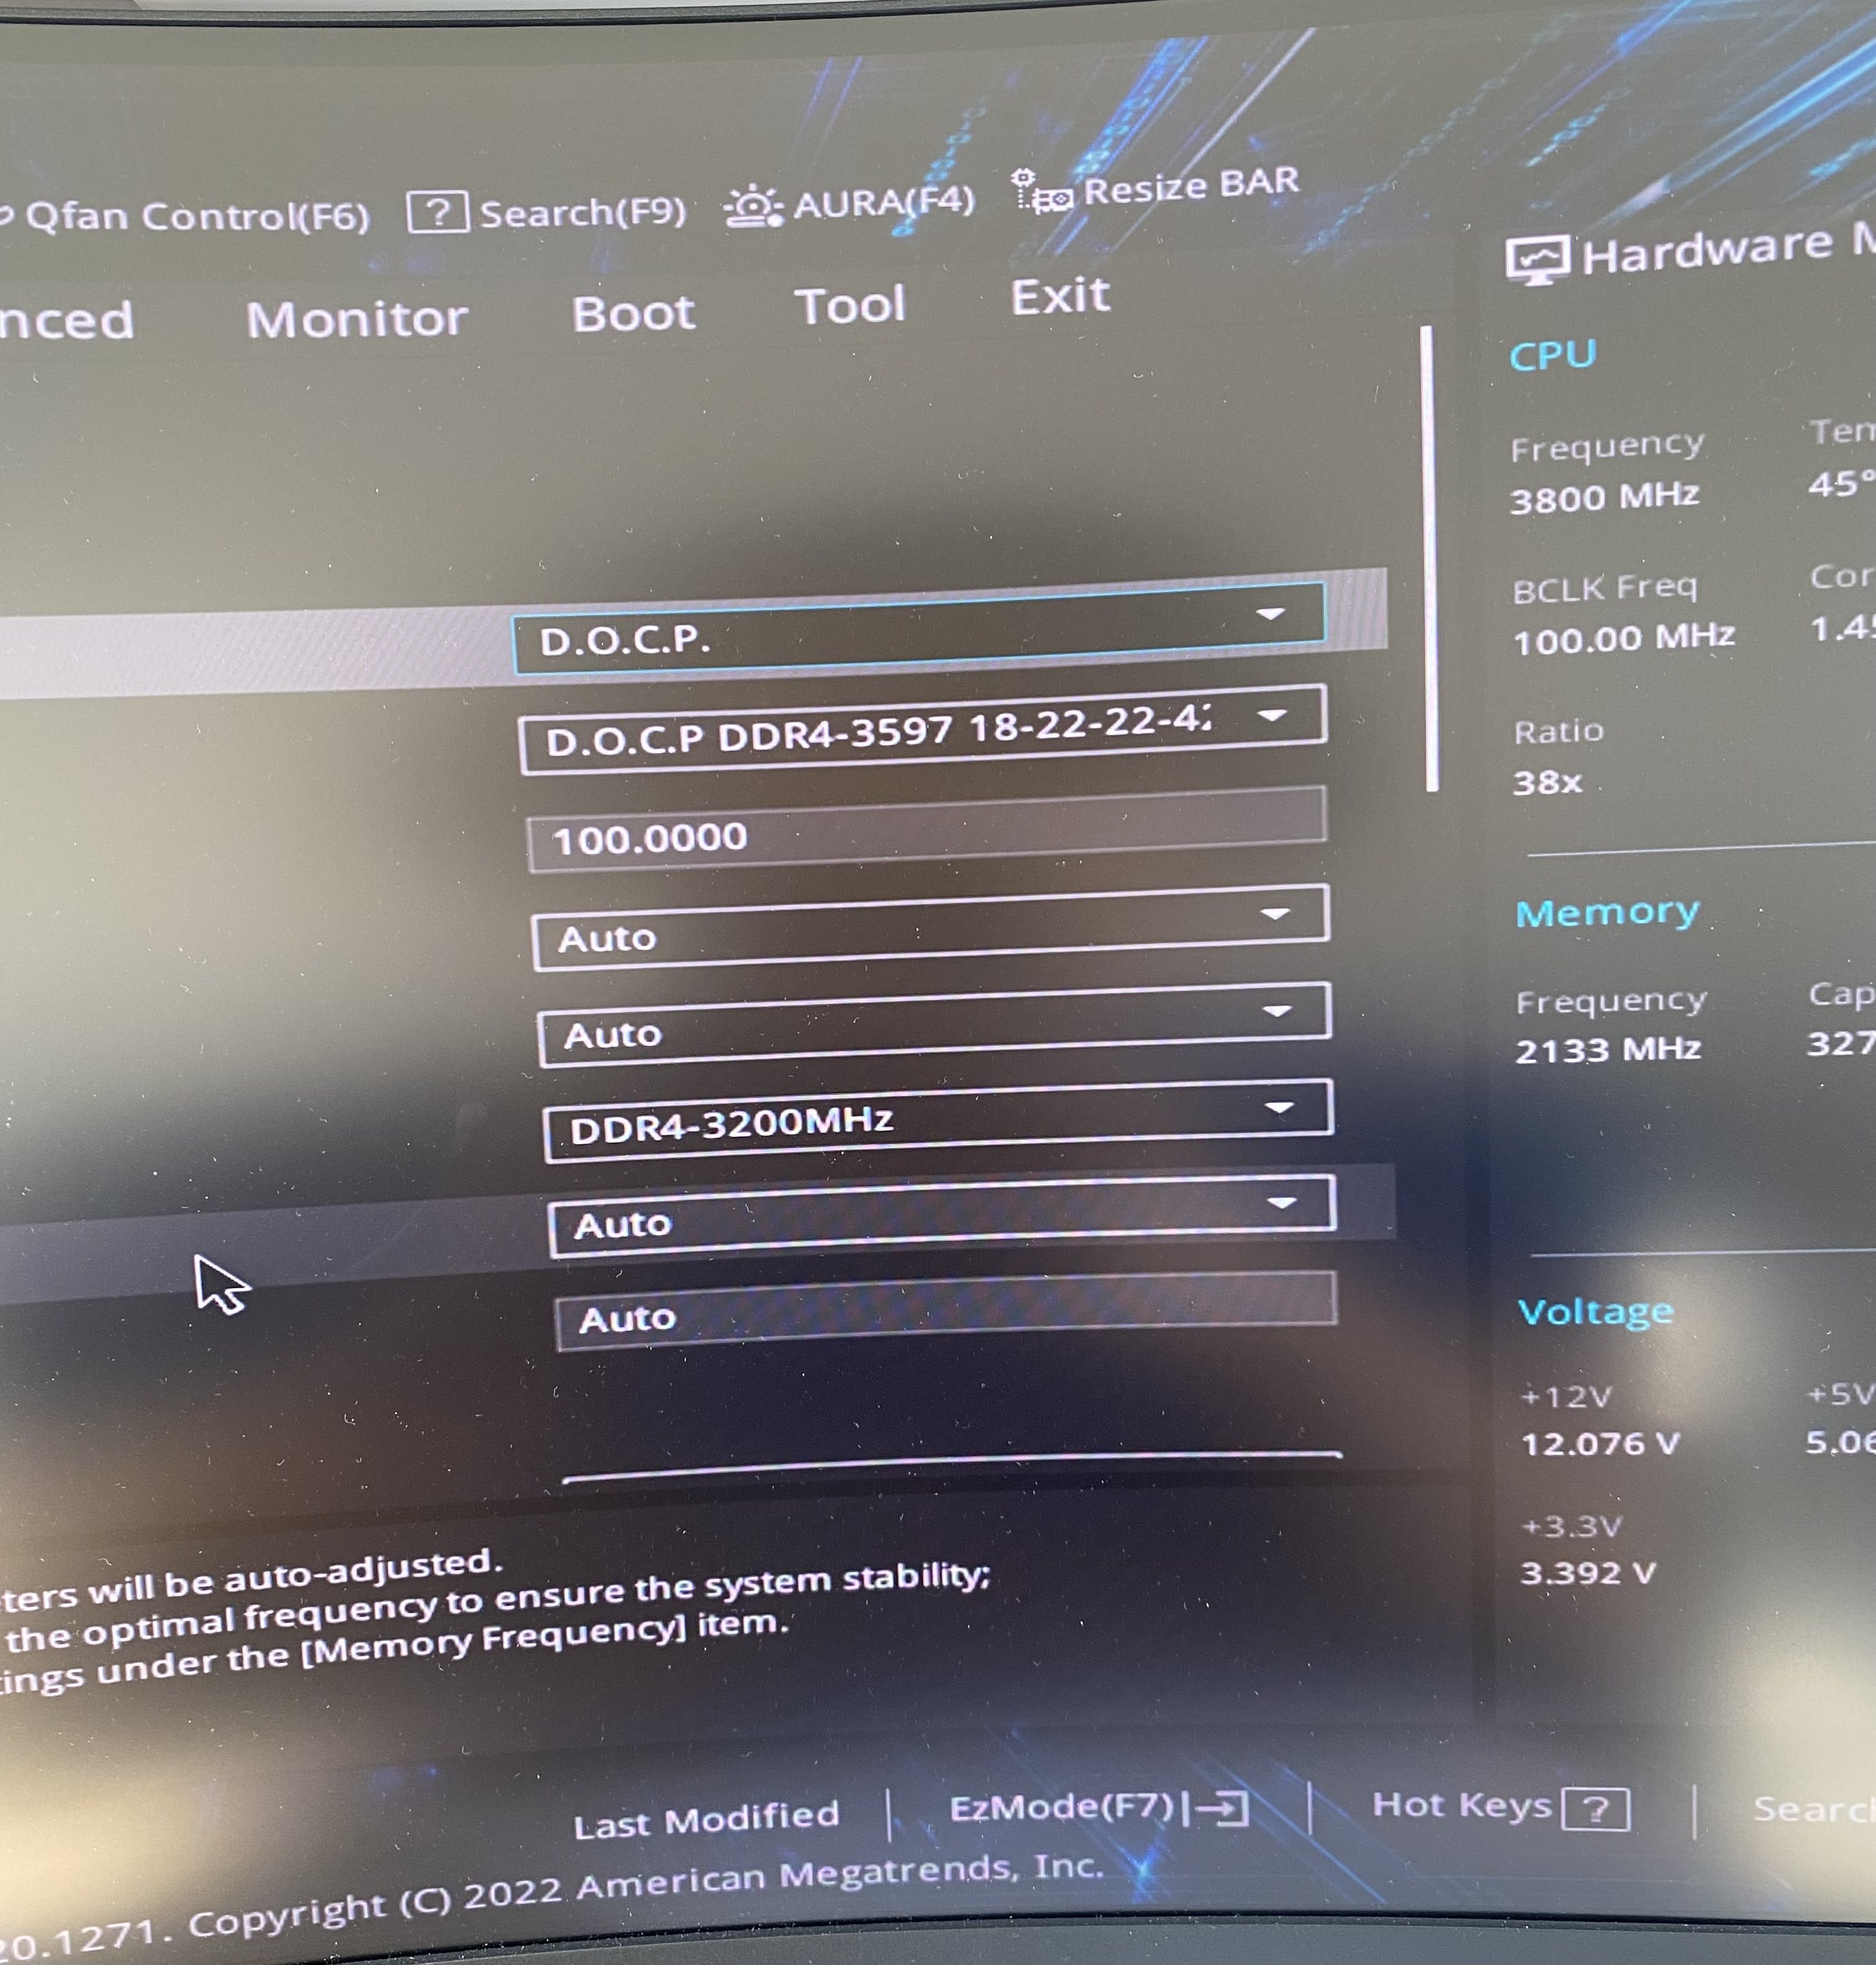
Problems: I ran into some problem while overlocking my RAM to 3600 Mhz, so just to be safe I OC'd my ram on 3500 Mhz, and it worked. I enabled DOCP which is known as Direct Overclocking Profile, it's also known as XMP.
Runchecks: I installed windows and restarted the PC to check if everything is fine. We are done!
What I learnt and experienced?
This built has helped me to gain confience in my abilities, technical skills and troubleshooting. I learnt about daisy chaining, wire management and enhanced my problem solving skills. Moreover, I am confident that I can now work with high towers and small cases as well.
I also enjoy playing competitive games, here are 2 clips from Call of Duty: Warzone since I am very passionate about CoD in general. I was also the Call of Duty community lead at UBC Esports : ) Thanks for watching!